Pages

Tuesday 27 December 2016

apothecary, a step by step journal page


I've been playing with some of my Christmas present goodies so thought I'd share a step by step to this journal page.


I've ummed and ahhed over these Prima watercolours for a while as I have watercolours already but decided to put them on my wishlist and my kind bro-in-law bought them for me for Christmas. [If you've not already discovered it, it's worth knowing that That's Crafty has a wishlist facility.  I just add things I'd like and relatives hop on and choose things for me for Christmas and birthdays!!]


I added the watercolours to my new star stamp by Carabelle Studio and stamped on the page, then added some puddles of colour.


My next step was some collaged papers as I wasn't sure where this page was going.


Stencilling with white is one of my 'go to's when things are looking a bit busy on a page.


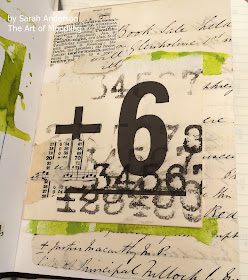
I added some stamping using some of my favourite numeral stamps and some textured Paper Artsy images.


My family know me well and my daughter wrapped up some White Company tissue paper (it's very architectural) as a Christmas pressie!  I added a bit to the page..


... before adding patches of letraset lettering.


I finished off the page by stamping out some images on white paper and cutting them out.  The leaves and bottles are by Paper Artsy, the Apothecary label is by Makistamps, and there are a couple of Chamil Garden stamps in there too.

 I am a much more frequent Instagrammer [@sarahthemoodler] than I am Blogger.  This time I had a bit of a play with the filters on IG and rather liked how this piece looks in black and white.


Saturday 10 September 2016

Making Marks

My goodness, I knew it had been a while since I'd blogged, but April?!!!  My internet presence is much better over on Instagram which is, well, pretty instant when it comes to sharing photos!


I have been using a LoT of PaperArtsy images lately and their latest challenge really caught my eye (I've been challenging myself to making my own marks rather than always using stamped images, as well as allowing myself to use stamped images to make marks as that's what I love and part of who I am!!), followed by Roxanne's (or 'By Bun' as I know her as I follow her on Instagram and love her work) wonderful step by step post today.  I don't have vintage photos in my stash but instead decided to apply her principles to a stamped image to see where it took me!


 I started by adding some fresco paints to my paper with my fingers.  I watched a fantastic video by Roben-Marie Smith this morning which also influenced this piece, starting with finger painting!


I added some splashes of watercolour ..


..followed by some sprinkles of PaperArtsy infusions.  I love how the colours merge and fleck.


I selected an area I really liked and wanted within the flower petals .... and missed!!  It's that splashy bit to the left of the numerals 487!!


I painted around the flower image with Snowflake fresco paint (I didn't have the same colours as Roxanne) which picked up some of the blue from the Infusions.  At the time I really wasn't keen on this but seeing it again now I'm not sure why!  I carried on though, telling myself it was a learning experience!


I added some yellow fresco paint, stencilled with some distress crayons, and stamped with Snowflake paint...


... and then got so involved I forgot to take any more step by step photos!!  There's lots more splashing of watercolour paint, some mark making with fresco paint and distress markers, some stamping and finally lots of collaged stamped images.  I had a great time rediscovering PaperArtsy stamps I've had for a long time!

I'm linking this to PaperArtsy's 17th blog challenge, 'Making Marks'

Saturday 30 April 2016

#the100daysproject

I am finding it much easier lately to post on Instagram rather than my blog.  You'll find me over there @sarahthemoodler.  I rarely blog hop either these days, which is a shame, but I guess it's the immediacy of seeing and producing images onto Instagram that makes it so much more accessible. No laptop to start up, just a touch on my phone!

I've recently decided to play along as part of the 100 days project on Instagram.  I suspect that I'll end up doing a collage a day but I didn't want to restrict myself to this so am using the hashtag #100daysofbeing creative.

day one

I have a feeling that the most challenging time will be when we go away on holiday as this year that is abroad :)

day two

I'll just have to be prepared with some stamped out images, and other collage fodder in my suitcase!

day three

I have to say, the beauty of collaging everyday is that you can let it take from a few minutes to a lot longer.  This fits in well with my life as I often come home from work absolutely exhausted from a day in the classroom, so getting out my paints etc is a bit overwhelming..

day four

...but a bit of cutting and sticking is definitely do-able.

day five

Each day I've included the number for that day somewhere in the collage.  There are often other numerals there too but the day number will also be there somewhere.

day six

Some days have a bit more inkiness.  Days when I've had a bit more time or energy.


I'm rather liking having something different on each page of the journal.  I am using an A6 hardback watercolour sketchbook and including a variety of ephemera, as well as some stamped images.

day seven

day eight

day nine

day ten

day eleven

Today's page came about following on from last Saturday's Documented Life Project prompt. Numerals are my thing, I have to say!  

day twelve


Saturday 9 April 2016

Happy Mail

 I recently put together some happy mail in response to the suggestion of an ephemera swap on Instagram.  I am finding I spend much more time over there these days than on my blog! @sarahthemoodler if you're on IG, please come and say hello!


I made a little matchbox from some brusho inked paper and some of my new stamps - have you found MAKIstamps?  There's some great images, especially the fun little Brownies!


 I filled the matchbox with some tiny stickers (step by step over on the Lavinia Stamps website if you fancy making some!) and other bits and pieces.


I filled a glassine envelope with goodies too.  I stamped the fern with black Versafine ink which then wouldn't dry so I embossed it with gold embossing powder and loved the effect!  Inside the envelope are tags and stickers and papers.


I collaged the front of a second glassine envelope filled with papers.  The envelope is from some Paperchase wrapping paper I've had forever and just LoVe!


I added a little notecard which I made using some endpapers from a book and some stamping ...


Sarah was really happy with her happy mail ..


...and when mine arrived the next day I was thrilled too!  I'm not sure how an envelope full of papers can bring such joy!!!


So I journaled about it using some of the treasures:


I love the little collaged card Sarah made and included in my package.


I also used some in this week's Documented Life Project page :)

Tuesday 1 March 2016

Anyone for stickers?

I've always LoVeD stickers!  I had sticker books as a child, and occasionally as an adult (my latest is the Minions one but don't tell anyone!)


There's something very satisfying about stickers, and the planner craze gives adult sticker lovers a legitimate excuse to use them :)  I don't have a planner as such; I have two moleskines, one to keep a diary and one as a diary so I know where I'm supposed to be etc.


But that didn't stop me from creating some stickers from blank labels using many of the tiny Lavinia Stamps.  You'll find my step by step over here - http://laviniastamps.com/making-stickers/

Saturday 23 January 2016

Hello DLP 2016 and other projects


This year's Original Documented Life Project is all about the 'unplanner'.  Although I'd love to be able to, I don't have the time that the whole 'unplanner' content would demand but the great thing about this project is it's flexibility - and I am able to use the weekly challenges in my Moleskine planner just like last year.


This is week #1 and I tried something new.  Taking inspiration from my daughter's laptop cover I tried a collage effect and added some co-ordinating card in the weekly header.


I've already fallen behind slightly with the challenges but that's ok.  My challenge this week was to include my own lettering on the page -it definitely improved the further down the page I got so I guess it'll get better over the weeks.


I had another type of  project keeping me busy over the Christmas break - a new letterbox!  I wish I'd taken a photograph of this when if first arrived as an ebay purchase as it was very dull - my husband polished it up and my job was to paint around the word 'letters'...


... which proved a touch tricky where the lower parts of the word were worn from many years of postman's fingertips pushing letters through.


My final 'other project' to share is one of my christmas presents ...


I LoVe Lego :)