Showing posts with label Adirondack acrylic dabbers. Show all posts

Friday, 15 October 2010

been poorly sick :(

... with an ear infection...which meant I couldn't teach my workshop at Paddy's on Wednesday. Big apologies to those I was supposed to teach! So, now feeling much better, I decided to do a step by step to one of the cards :)


Sometimes it feels like it must just be the right time to do something!  I'd been wanting to do a card with stepped folds for a little while, then spotted that Vixykins had had a similar plan. I thought that tumbling Autumn leaves would be a great theme for this card design.


 So I headed over to Sandy's blog, as directed by Vix, to get some idea of the folds.  I then adapted it to fit on a square card base.  Thanks Sandy and Vix for the inspiration!

Ok, step 1

Using acrylic paints (I used Stewart Gill True Colours, but Adirondack Dabbers are also fine!), smoosh and print autumn colours over a piece of cardboard (Amazon packaging in my case!)

Step 2

Apply gold paint to a leaf stamp using a sponge or dabber and stamp onto your painted cardboard.  I used the Tick Tock Flowers plate by the Artistic Stamper which is also available at Paddy's Stamping Place.

Step 3


Cut five leaves out, following the general shape of the leaf.  

Step 4

Head over to Sandy's blog and fold and cut your card (can you see the mistake I made with mine above? ) Stamp leaves over the card again using gold acrylic paint.

Step 5


Place a piece of A5 paper under the central section of the card and stencil through sequin waste with red, yellow, gold acrylic paints on the centre of the card.

Step 6

Fold your card correctly, and add your leaves and additional elements using Glossy Accents as necessary!


If you get around to making one of these cards, please let me know as I'd love to come and see :)  Now I've spotted that The StampMan's current challenge is Autumn so I'm off to link in this post :)  Vix is demoing at The Stamp Man tomorrow so I'm heading up there with her for a day of craftiness and friendship :)

Thursday, 10 June 2010

yummy colours in pdcc#33, and a fab prize

How cool is this stamp set?  It's from Practicing Creativity, our sponsors at The Play Date Cafe this week.  I just LoVe that tree, and you could make a flip flop tree and flip flop flowers with this set - FaB!!  If you want a chance of winning these stamps, you just need to enter our colour challenge this week using Mona's yummy colours:


I've just bought a peg bag in these colours funnily enough, and with wooden pegs it matches the challenge perfectly lol! 


I got out my kraft envelopes when I saw these colours though...I just LoVe working with brown paper, and once found some cardstock this colour too - that didn't last long!


I nearly missed an appointment I was so engrossed in this project - I just LoVe this colour combo :)  In fact, there's a lot of favourites in this project - the colours, brown envelope, spray ink, adirondack paint dabbers, flowers and little bitty bits!


The spray ink is a summer sticky fingers spray - aqua.  The flower stamp is from Botanicals plate #1 by The Artistic Stamper.


And the punch is my only Martha Stewart one, hydrangea border :)

This week we have additional inspiration from Courtney Baker of Practicing Creativity as well as our regular designers - why not hop over to the Play Date Cafe to see what yumminess they've produced, and visit their blogs to leave some love :)  And don't forget, play date entries just need to use our colours, they don't have to be cards!

Wednesday, 21 April 2010

an insightful carrot [or PDCC25!]


Better late than never for my play date cafe design piece!  I so wanted to get a piece done for this week's challenge as my new carrot (from Wendy at The Stamp Attic) stamp was just too appropriate not to use!!!  I had such a busy week last week and into this, so I took some journal time last night to relax.


These pages had pieces of text on them from teaching my Art Journaling 2 class and the text still peeks through the white dabber paint in places.  Tim's clock mask is one of my favourites, along with sequin waste so I happily splooshed and stamped my black and white paints and added the odd hint of orange.


I found the quote after googling 'carrot quotes'.  Who'd have thought Paul Cezanne would have been discussing carrots!

 
To colour my carrot boy, I wet my stamp and coloured it with caran d'ache neocolour watersoluble wax pastels.  I then stamped onto dry card and coloured his body in with colour from the pastel on my brush.

Monday, 5 April 2010

kristen's nighty night owl


Over at kpink it's Mixed Media Monday and Kristen's featuring my owl card :)  I just love this image and it was perfect for a couple of birthday cards I needed to make.


I cut a very layered piece of watercolour paper  (made on Dina Wakley's workshop at Art from the Heart a few weeks ago), and persuaded it through the printer!  I then printed the image again on white paper and cut out, then painted, the owl's head feathers and the leaves on the branch.  I also used gold adirondack paint dabber paint to colour her beak and heart, and espresso to colour the branch.  Then it was time for the sewing machine - yay!!  There's just something so satisfying about stitching on paper!!


I use a free machine foot, drop the feed dogs, then just follow the lines of the image.  This little nightime owl is layered onto some text paper, photocopied fabric (you may recognise that from a recent play date challenge owl), and a colour photocopy of my layered Dina paper  :)

Friday, 2 April 2010

art journaling weekend near Oxford


Next weekend, 10th/11th April 2010, I'm teaching my art journaling 1 and 2 classes at The Stamp Attic, which effectively means I'm teaching an art journaling weekend!!  How fab is that?!!  I'm so excited.  I love teaching workshops, and I love teaching them in different places as I tweak them according to the shop I'm teaching at and therefore the supplies available.  [And I get to visit with my friend Wendy and spend too much money in her yummy shop lol!!  She's got Tim's butterfly die in stock - I can't wait!!!]


What always remains the same though, is my emphasis on using your rubber stamps in your journal.  These are images you've bought because you love them, yet when do we stamp them up and look at them ourselves?  They'll mainly be used to make cards for other people (unless we take those cards back lol I've done that with my Mum and know I'm not the only one  ;) )


So if you fancy taking some time out for yourself (which is very good for you!) we have a couple of places left on Saturday 10th April at The Stamp Attic where you'll be introduced to art journaling and go home with a few pages started and at least one page completely finished.  We'll be colouring our pages with paint, stamping, masking and stencilling, and learning funky writing styles and then binding our pages together with a bind it all.  In fact, plenty of 'moodling' :)  As far as I know, AJ2 is full, but speak to Wendy and just check if you're interested.

Thursday, 25 March 2010

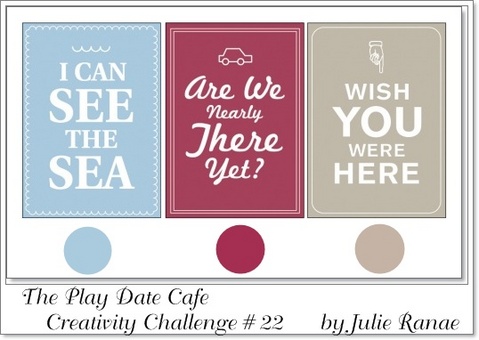
string, nails and an old fork for PDCC#22

 
I know, I know, but that taupe just said 'string' to me, although when I got the string out it was almost white!  Still, I liked my idea and being more of a painty, sploshy person, it was Adirondack Acrylic Dabbers that I had in these colours.


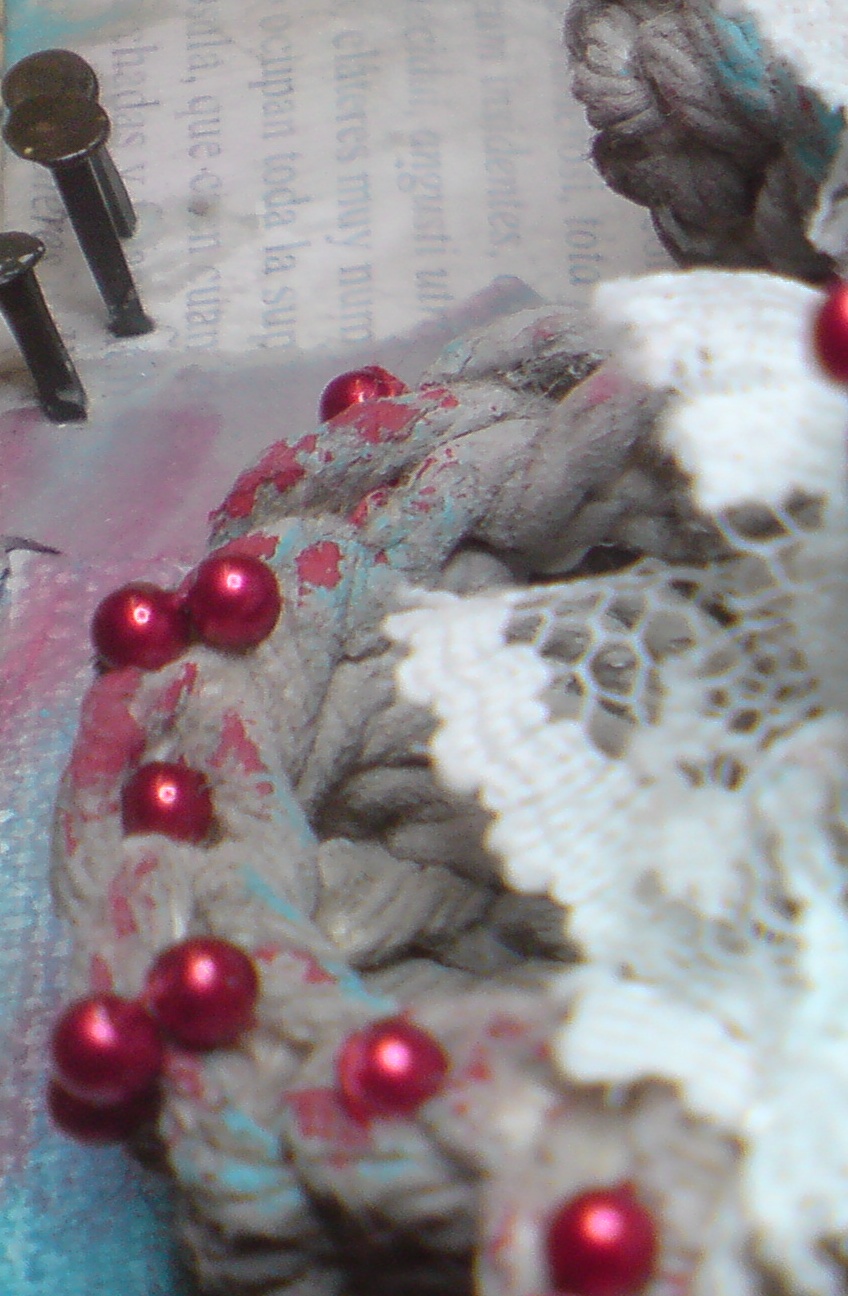
So after fighting with the string in order to crochet a flower, I then painted it with 'pebble' before putting some 'pool' and 'red pepper' highlights on there.    Adding the beads did relax me after my tussle but the flower looked a bit big and chunky on it's own...


...so I had a hunt around amongst my canvases and discovered one I'd not finished on a workshop.  It was one of Sue's workshops and I just aDoRe the cute nails hammered in around the sides.  Malc was rather suspicious that I'd been raiding his garage but was satisfied when I told him they were Sue's own nails, not even pinched from her hubby lol.  With just a slight alteration, the canvas now looks like this:


which I'm thrilled with, although it might still gain something around the stem of the flower.  It would be a word but for some reason, Malc hates words on artwork, and I rather fancy putting this one on the wall.

I would LoVe to see some mixed media pieces in the play date challenge this week; they can be small, they don't have to be this ambitious ;)

Don't forget to check out the other design team member's blogs,  there are some stunning cards this week, and you can read up on what got Stephanie into this stamping lark here.

Have a great week!!

Thursday, 18 March 2010

time for some more fresh spring colours in the play date cafe


I can't wait for the cherry blossom to be out.  They are my favourite-est spring flowers :)  I just LoVeD working with Mona's colour choice this week.  In fact, when I was writing up my last post, I realised I'd used this colour combo in Sue's journal when we did our round robin, working in each other's journals.  That was me being cheeky as Sue isn't really a pink person ;)


I have adirondack paint dabbers in these colours and I just LoVe using these as they make applying paint to paper, stamps, through stencils etc, just so easy.  So I made a layered background which I then cut into a butterfly shape and stitched to my card.

I stencilled through the lace on the butterfly piece,  then painted it up completely before mounting it on the card.  The yellow flowers are drawn with my sewing machine , I do so love doing that!!


Thanks for coming over!  I do appreciate all your comments :)  Don't forget to visit the play date cafe and see all the other yummy cards our designers came up with this week.  I love them all :)  And you can read about how Savannah, one of our new designers, got into stamping.

Sunday, 24 January 2010

GPP Street Team Crusade No 36 - Braving the Elements

I chuckled to myself writing that title as although it really refers to the recent cold weather, I do feel I braved, or even battled, with one of the elements we had to use in this challenge!


Michelle Ward's challenge was to gesso a journal page, paint it with acrylics, splash it with water and wipe (I forgot to wipe...ooops!) then stencil with homemade snowflakes before adding them to the page. 


It was the paint on the gesso I battled with!  I'm used to splooshing my paint around, dabbing and blending it, leaving some areas dark and making other areas lighter by watering down the paint.  Acrylic paint does not behave itself when it's on top of gesso....aaaarrrgh!

Having said that, I LOVE the result!!


I meant to take a couple of photos as I went along but I got a bit engrossed and forgot!!  I used Adirondack paint dabbers [stream, pool, eggplant, snowcap] and then highlighted areas with my new Inktense colouring pencils.  This was soooooooo relaxing, and the gesso base gives a great 'tooth' for the pencil. 


The final task was to add some journalling, which I did, but may paint over as I'm not happy with it.  I preferred the page without it and imagine it would look better with white gel pen handwriting across areas.  I was trying not to write in and out of the snowflakes, don't know why, just thought I ought to try something different!!


This is my first time at entering this challenge, although I've often looked and drooled over entries.  If you look at my snowflakes, they have little hearts in there, an idea I stole from Julie Prichard!  I've always put straight cuts into homemade snowflakes before!!

Going to leave you with a couple of images of the pages I did yesterday to demonstrate how I layer acrylic paint onto my journal page, and later add stamping and images.  It's still a page in progress.


The page on the right, below, was one from a previous demo which I added to with a baby wipe and green true colours paint to co-ordinate a little better with the page on the left.


Tuesday, 29 December 2009

calendar challenge


A month or so back Kate was inspired by Jill over at the Third Age Musing blog to create a journal calendar page for December '09 and to fill it in daily [see above photo].  As it went so well during the busiest month of her year, she's challenged us to do it for the year.   You can sign up here.

The work is really only in the preparation.  And as the choice of design is up to you, it's down to how much time you have.  Otherwise the daily commitment is only 5 minutes!!!  The challenge is to fill in a little tiny square each day with a word, a picture or a sentence picking out something from your day. 


Kate used pages in her A4 moleskine, adding another challenge for herself by working larger than she's used to.  I decided I wanted to make a book which will then become a diary of the year.  I'll be REALLY chuffed if I manage to write in it everyday, I've never managed to keep a diary beyond the first week or two of January ;)

I started with a large sheet of Bockingford watercolour paper on the kitchen floor and had a wonderful time adding colour to it using my adirondack paint dabbers.


When my husband came into our small kitchen to get his breakfast, he was very sweet and really didn't mind manoeuvring around me, but did fall about laughing at me and insisted on taking a photo...which I'm not sharing!!


Once I'd painted both sides and they were dry, I tore the paper into eight pieces, and sewed down the middle of seven of them to create a book.

 
I had a very relaxing time adding tabs to each page which I'll put the calendar months on. 

Then promptly forgot I was taking step by step photos!!  I've stamped the first open spread page using adirondack paint dabbers and stamps by Tim Holtz, Wendy Vecchi and Lost Coast Designs, highlighted the letters saying 'january' using a very soft graphite pencel, and added printed words and 1" squares cut from a sheet of white card stained with coffee.


It's still waiting for '2010' to be added, and 'january' to be added to the tag, but otherwise I'm pretty much set!  The book needs a cover, and I'm going to prep february's page next, but it's good to go for Friday :)

Thanks Kate, this is going to be great fun!!!  And hello to all my new followers!  And the uplifting comments people have left as part of the Stamp Man's first blog hop.  If you've not joined in yet, there's still time!  You've got until midnight GMT Sunday 3rd January 2010.  My part of the blog hop is the post below this one.  Happy Hopping!

LinkWithin

Related Posts with Thumbnails