

I love stars, they're great images to work with, and they're this week's challenge theme over on the Stampotique Designers Challenge Blog. I took step by step photos as I made this stitched piece so you could see how I got from this ...

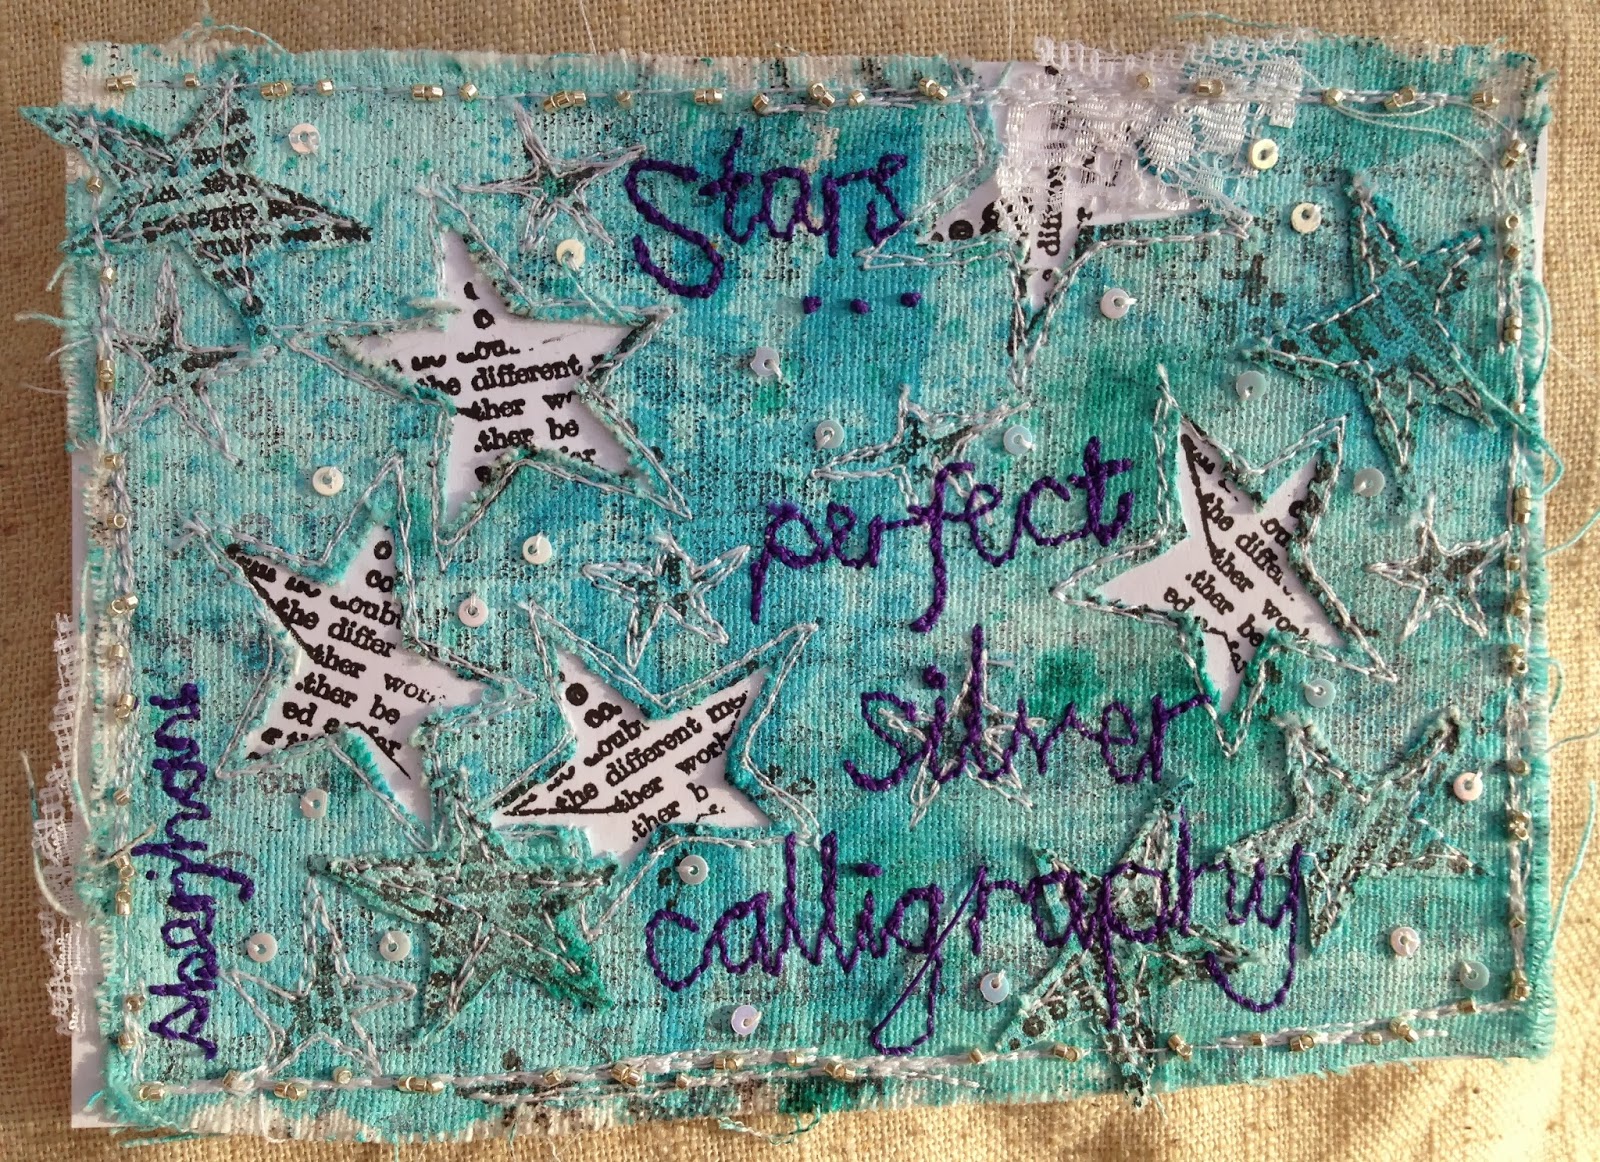
to this...
I started with a piece of white fabric that I roughly painted with white acrylic paint then stamped Journey Collage with black ink. To make this a bit lighter I first stamped it on paper then stamped on the fabric a number of times.

I then put Peacock Feather distress ink and some blue Dylusions ink onto the lid of a plastic box and smooshed my fabric through it.

Jo Capper-Sandon's text star is one of my favourite stamps (and I LoVe the miniature star on the side of the block, such a clever idea). I stamped this over the fabric ...

... carefully cut out the larger stars with a very sharp pair of scissors ....

.... before laying a piece of white card underneath and stamping the star again through the star holes. I decided to go for an approximate fit rather than matching the shape exactly...

A touch of free machining around each star ...

... and some more free machining after I found a quote I liked!


If you're inspired by stars, you can join us here to read more about Sam's challenge, then link it up here. We'd love to see your interpretation of this challenge.
Stampotique stamps used:
Beautiful work Sarah, pretty colours & fab stars. Thanks for the tutorial:-) x
ReplyDeleteGorgeous Sarah, I'm gonna have to overcome my fear of the sewing machine :)
ReplyDeleteSuzi B x
Beautiful piece Sarah! Love the process pics! Just reminds me - sewing machine still hidden!! Hugs, Chrisx
ReplyDeleteSarah, this is just an amazing piece of art! Love how you offset the star stamp just slightly, as it adds so much interest. Thanks for sharing the process with us. And, I agree, great poetry!
ReplyDeleteWow, thanks for the step by step, this is a great piece!!
ReplyDeleteSarah, this is stunning. The teacher in you is the shining star in this presentation! Terrific!
ReplyDeleteLove this! The use of the fabric is so cool and the stars that come through where you cut out. Awesome job!
ReplyDelete