Saturday 30 October 2010

dimentians of recycling!


I promise you it's not a spelling mistake!  I worked with a group of dementia sufferers and their carers this morning at their 'dementia cafe' and my Sophie couldn't remember the word dementia and used dimensions, which I thought was rather a fab play on words!  Anyway, getting to the point, we made little notebooks pretty much entirely from recycled materials, so I thought I'd share the steps with you here!  It was such a fun morning, with lots of laughter, singing, and new friends made :)

To make the book, have a rummage around the house and find some cardboard such as an Amazon box, discarded envelopes, the dregs of a matchpot of emulsion paint, string/twine, buttons and old book paper/music paper.


Cut two pieces of cardboard 7.5cm x 10.5cm


Tear off strips of the paper covering on one side of each of the pieces.


Use a piece of kitchen towel to smear some emulsion or acrylic paint over the card.  If you rub in a couple of colours it looks amazing!  I just wish I'd taken pictures of some of the work from this morning!


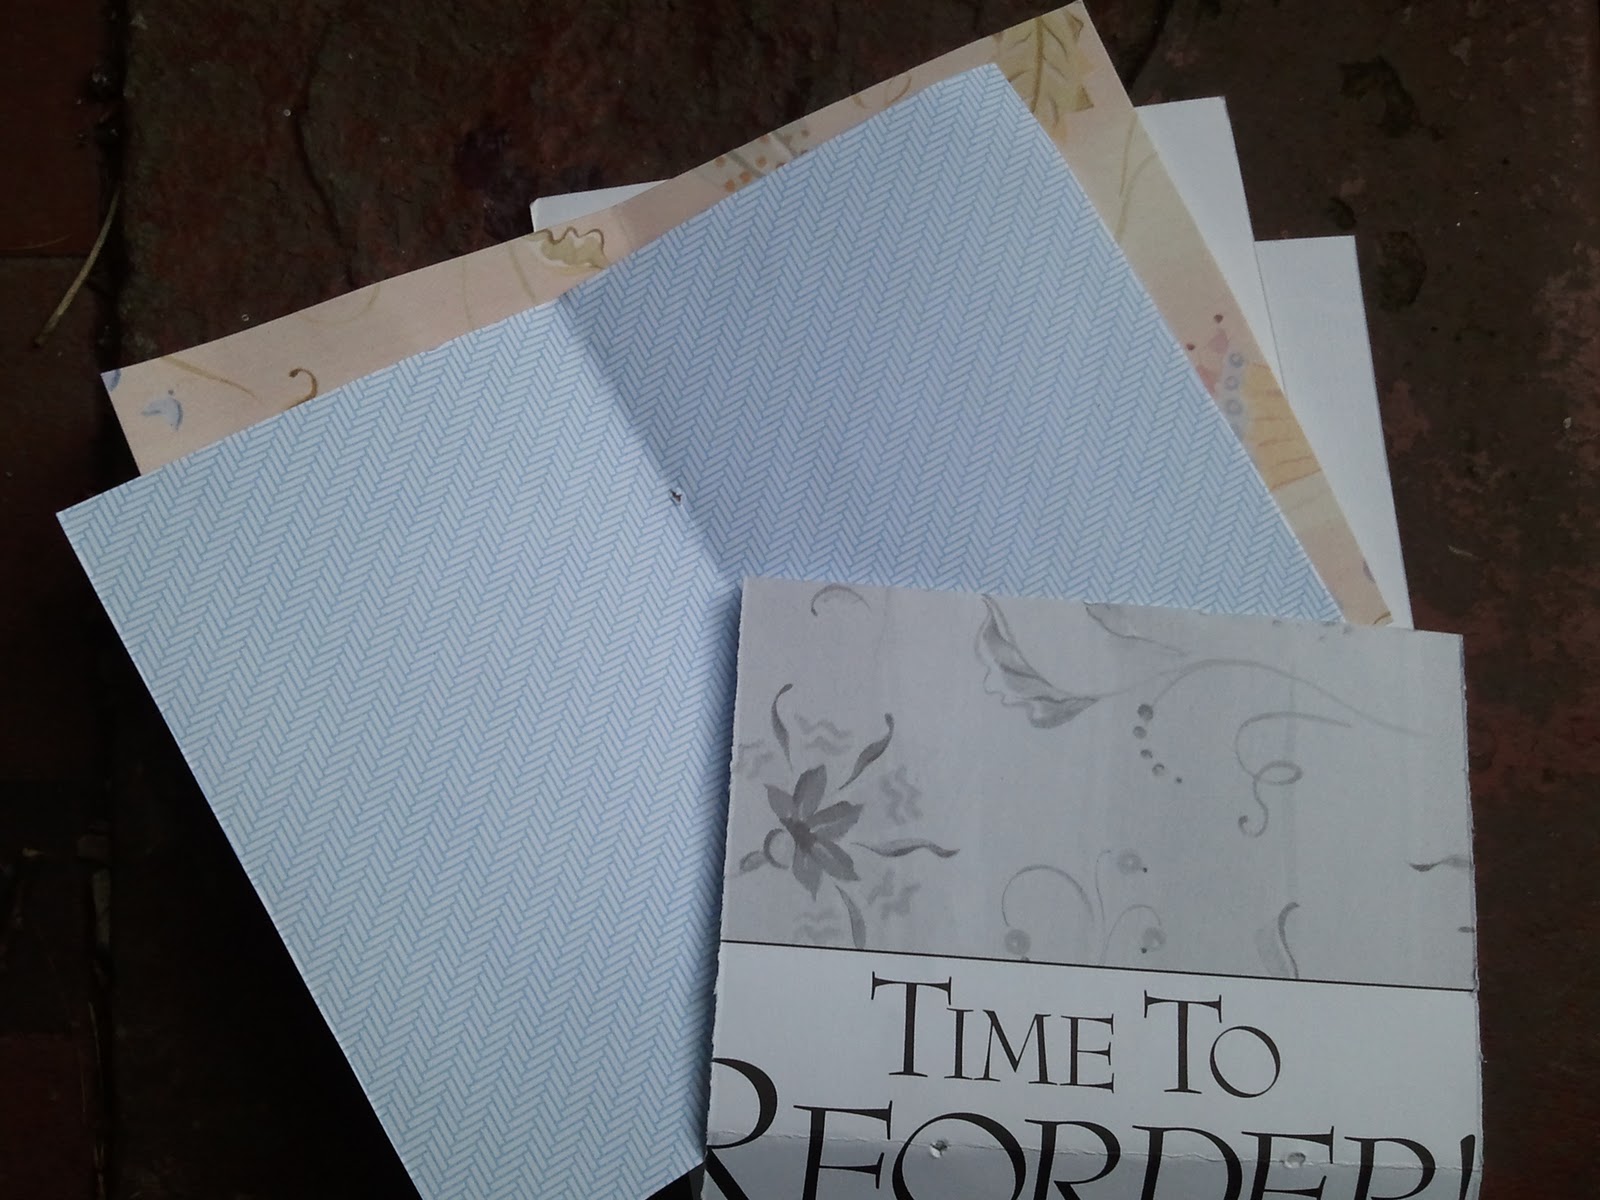
Trim at least 6 pieces of paper measuring 15cm x 11cm (that's 1/4 of an A4 sheet)

[digression:  the shift button on the numeral 4 on my keyboard gives me a $, so I  have £s and $s available; I was surprised to discover recently that US keyboards don't feature £s - I know I shouldn't be surprised, but I was!!!] 


Fold the papers in half, nest them together like a little book, poke two holes (no need for precision)  and tie a piece of string through.


Use double sided sticky tape, or a pritt stick to glue the card covers to the little book.  
Decorate using a flower and a button.  The button isn't sewn on.  I tie a piece of
string through before gluing it down :)


You can then decorate the pages inside with torn pieces of text...


and punched shapes...


Just outside the community centre where we met this morning was this gorgeous owl - isn't he fab?


Thursday 28 October 2010

PDCC53 Into our Second Year :)

How cool is that :)  Thanks to all of you who joined in our celebrations last week.  This week is colour splash week, a favourite within The Play Date Cafe, and a great way to start our second year of the challenge :)


Whilst out hunting for a photographs for this week's colour splash I came across this image by trunkguy.  


He had been playing with a colour splash app on his iphone (so jealous, I so wanted an iphone!!) and produced this image.  I fell in love with the colours, and I just happen to love Acquilega too - gorgeous, gorgeous flowers!


This week the design team were all sent the above set of stamps from Mark's Finest Papers.  They are clearly designed for card making (or tags) so I decided to challenge myself - was it possible to use stamps such as these for a journal page?


I'm happy to say it is :)  I played with Black Soot and Aged Mahogany distress inks, stamping words repeatedly for texture then individually to show what the page is about.  It is good to be thankful for all the great things we have in our lives so I added a weeny envelope to the page so I can place 'thankful' tags in it.  This is my A5 Daler Rowney sketchbook.


We'd love to have you join us over in the cafe this week.  You don't have to make a card, or even a journal page, it can be aNYTHiNG you've made in the colours of the week - black, white and a splash of burgundy!
We've even had cakes lol ;)


There's some fabulous inspiration on our designers' blogs, so head over there for a lookie :)


Then stop by the cafe to link up your piece so we can all head on over to see your work :)

Wednesday 27 October 2010

WOYWW - down on the floor


... doing a bit more on my first big painting!  Working to such a large scale means I'm finding alternatives to my usual tools.  The watered down acrylic worked 'ok' in the garden water spray bottle, but I'd have preferred more of a 'mist' than a direct spray.  I am pleased with my large 'A' though, cut from newspaper and used as a mask.  The piece still needs some more work but I'm happy with what I've done so far :)  I even did some planning in my sketchbook!


And I have exciting news!  At the moment I have a craft room in the cellar.  Although there are worktables down there, it just ends up as a dumping ground and storage area.  Our house has an open plan attic and Malc and I are moving up there, swapping rooms with our middle son.  As long as I keep it tidy I'm allowed half of the room as a studio - I feel so grown up!  So going up and down three flights of stairs is keeping me fit this week!!!

Looking forward to picking up some organisational tips from all you WOYWWers [that's What's on your workdesk Wednesday for those of you who haven't come across this fabulous idea - a good nosy at what others are up to!  Head on over to The Stamping Ground for a look:)]

Tuesday 26 October 2010

life just got in the way!


Sorry to have been away so long!  I do supply cover at a local day nursery and a day there followed by private tutoring has me in bed VeRY early!  That was Friday, then Saturday saw me driving down to The Stamp Attic near Oxford where I taught my art journaling class on Sunday.


I started this page in class, using it to demonstrate some techniques.  I love leaves, and it's the shape of them that have been attracting my eye this year.  My usual preferred leaf shape is the maple but after playing with my Tattered Leaves die and Inkadinkado stamps I think the oak leaf has taken over!


Oh, and there's a rather sweet Hero Arts leaf in there too!  Very relaxing just layering leaves on a page.  This is my A4 journal made from various papers.  I noticed the other week that the only words in here are three on the reverse of the tags to the left of this page.  This journal has just been about playing with images, layers and colour :)

Thursday 21 October 2010

It's Party Time in the Play Date Cafe - We're One Year Old Today :)

We're celebrating a WHoLe YeaR of challenges over at The Play Date Cafe today so I'd like to thank eVeRYoNe who plays, has played, or intends to play but never manages it, for your support.   There's tonnes of inspiration for you in the cafe this week as everyone who was on our first design team is joining us, including our first private blend designer Mona Pendleton.


But you can't have a celebration without CaKe :)  The Play Date Cafe Colour Challenge accepts all creative submissions, as long as the chosen colours are the main colours of your piece, so here's my contribution to the party - fairy cakes (like mini cupcakes) !


My husband did ask me how cakes worked for a blog party; well, you look at them in a photograph, and I eat them in your honour ;)   Actually, I'm not too keen on orange flavouring (which is in the buttercream - icing sugar and butter - which is yellow IRL) so I think I'll just eat the whole tube of pink smarties :)

We'd love to have you play along this week.  Julie is doing a full week of inspiration over in the cafe, and we have two fabulous sponsors which means some great prizes :)


These great chipboard letters are from Cosmo Cricket, and Unity have sent a pile of Itty Bitty stamps from their Ippity range [Ippity stamps are available in the UK via an Ippity girl, of which there are a few but our very own Ruby is one so contact her if you are interested in any you see, the rubber is amazing and the images  fab!!]


Our guest designer this week is AJ Otto, Unity's design team co-ordinator.   To see all the work from our designers, please visit the cafe and PaRTY!!!  :)  My Itty Bitty stamp is still winging it's way to me over the ocean but when it arrives I will be making a piece with it and posting it here so watch this space :)

Monday 18 October 2010

starting my first BiG painting :)

1m x 1m canvas

The vicar at my church saw my paintings last week and asked if I'd paint one for the prayer room in church, during a service!  So last night saw me painting on the stage, trying NoT to get paint on all that lovely wood panelling LOL.  I'm thrilled with what I managed to get done as I've wanted to work on a large canvas for ages but it was a bit of a scary thought!


I used my usual materials - bubble wrap, sequin waste and acrylic paint [but not my baby wipes yet] and cut my own stencil from funky foam.  Next step is more stencilling, and creating some large letter stamps and masks :)

It really felt like I'd come 'full circle' doing this as it was as I watched Graham Hudson from the Mustard Tree painting in a service in May 2010 to raise money for a trip to Mexico that I realised that I could do what I do in my journals on a canvas!  Thanks Graham, for the inspiration :)

EDIT:  Thanks so much for your lovely comments everyone.  I thought no-one liked me anymore as there were no comments all day, then Julie reminded me I'd put comment moderation on!!!  I've been having problems with spam comments advertising unsavoury things, so need some kind of moderation, but I've gone back to word verification instead so I know you are there :)  

Saturday 16 October 2010

glowing like the moon at The StampMan


Or maybe that post title should be 'shining like a star' as my hands were certainly very shiny after playing with Starburst Stains at The StampMan today lol!  I've had a set of these for a while now so when I got the opportunity to spend the day with one of the Queens of stardust (well, at least two really!)  I jumped at the chance.

 The transformation of the powder (left) to ink (right) can be quite dramatic.

[Of course the most dramatic colour is the one I did before taking photos!!!]  These inks come in powder form then you top them up with hot tap water, stir and leave to stand.


Then you watch the lovely Vix paint one colour of ink onto a sheet of paper [action shot there of Vix shaking the jar of blue as the mica settles at the bottom after a while]...


... add drops of a couple of other colours, before folding the paper in half and scrunching it into a ball...


...which transforms it into this FaBuLouS piece of paper :)  SHiNY :)


You can make a paler piece by putting clean water onto the paper first instead of a colour stain.  I had a wonderful play with this technique and ended up with very blue hands, which Jill took photos of so I'm keeping an eye on her blog lol.


I then had a play in my journal, spraying one of the stains then stamping with paint dabbers before adding punched snowflakes and one of the images from the Butterfly Beauties plate.


Turning this butterfly beauty into a winter one was inspired by a card Vix had made [ok, ok, I nicked the idea off her, but with permission :)]  When I find my small snowflake punch I'm going to add more snowflakes to her hair!!  

The StampMan shop is always crammed with beautiful samples, so I took these photos with Julie in mind, as she'd have loved to have come and played!  Apologies to the other lovely ladies who were demoing, I didn't take any pics as I was distracted by my new inks, but you can find Michelle here and Jill B here.


Friday 15 October 2010

been poorly sick :(

... with an ear infection...which meant I couldn't teach my workshop at Paddy's on Wednesday. Big apologies to those I was supposed to teach! So, now feeling much better, I decided to do a step by step to one of the cards :)


Sometimes it feels like it must just be the right time to do something!  I'd been wanting to do a card with stepped folds for a little while, then spotted that Vixykins had had a similar plan. I thought that tumbling Autumn leaves would be a great theme for this card design.


 So I headed over to Sandy's blog, as directed by Vix, to get some idea of the folds.  I then adapted it to fit on a square card base.  Thanks Sandy and Vix for the inspiration!

Ok, step 1

Using acrylic paints (I used Stewart Gill True Colours, but Adirondack Dabbers are also fine!), smoosh and print autumn colours over a piece of cardboard (Amazon packaging in my case!)

Step 2

Apply gold paint to a leaf stamp using a sponge or dabber and stamp onto your painted cardboard.  I used the Tick Tock Flowers plate by the Artistic Stamper which is also available at Paddy's Stamping Place.

Step 3


Cut five leaves out, following the general shape of the leaf.  

Step 4

Head over to Sandy's blog and fold and cut your card (can you see the mistake I made with mine above? ) Stamp leaves over the card again using gold acrylic paint.

Step 5


Place a piece of A5 paper under the central section of the card and stencil through sequin waste with red, yellow, gold acrylic paints on the centre of the card.

Step 6

Fold your card correctly, and add your leaves and additional elements using Glossy Accents as necessary!


If you get around to making one of these cards, please let me know as I'd love to come and see :)  Now I've spotted that The StampMan's current challenge is Autumn so I'm off to link in this post :)  Vix is demoing at The Stamp Man tomorrow so I'm heading up there with her for a day of craftiness and friendship :)

LinkWithin

Related Posts with Thumbnails