Monday 30 August 2010

USArtQuest DT project #6 - hopping around the design team's blogs


For today's design team project we've made it easier for you to hop around the whole team and see all the USArtQuest projects together.  After starting at the USArtQuest blog itself, you should have come to me from the talented and generous [did you see she had a giveaway?]


We were all supplied with a wonderful MicaColor watercolour palette, again something I've seen many times but never actually owned.  I've always meant to make my own up, but never got round to it [sound familiar?]

With just a small amount of water you can make a really rich, creamy metallic paint


or with more water, you can produce a more 'watercolour' effect.  The colours in the palettes co-ordinate beautifully so I chose the blue, gold and brown to make a shimmery ATC.


I laid down three patches of blue paint, followed by gold, 


then brown.
When using a paintbrush and paints I always want to blend my colours together nicely, and yet I love the effect of  strong contrast, so I've got over this by putting my colour down onto a piece of foil (as I can never find my teflon mat lol; another alternative is a plastic box lid)...

...then taking a print off this by laying my card on top.

Hey presto, a marbled like effect which I'm more than happy with :)

I often wipe my paintbrush onto a piece of paper before washing it clean, which then means I have lovely sweeps of colour to stamp over then cut out.
MicaColour is thick and creamy enough to stamp with, just use a little water to get enough paint onto your brush, then apply this to your stamp

I made up some more pieces of card with the MicaColour paint and stamped an apt saying onto a co-ordinating piece to create my ATC


I'll pick a name using random generator next Monday [6th September] and send this ATC to the lucky person, along with a few USArtQuest bits to play with yourself.

Now it's time for the last stage of the hop, and a visit to 
Terri

whilst I sit here thinking - pearly roses , now they'd be nice to make with these paints :)

Thursday 26 August 2010

PDCC#44 Play date with a difference

Oh if only I'd been standing a little more to the right, that crown on the wall would look like it really was on Penny's head lol!

We have a Play Date with a difference this week, courtesy of a conversation Penny Bearcroft and I had at one of my workshops at The Stamp Attic, Wantage!  Penny thought it would be good to give people a ReaL colour challenge, with colours that didn't go together, and were yucky!  I had a think, and asked Penny to come up with some such colours.  After she named hot pink, mustard and navy blue, I gathered some art supplies in said colours, and off we went!

Now I've picked the colours to tone, and happen to love this combo, but my question is, if the colours are tonally correct, are there any colours that don't go together? We'd love to hear any suggestions.

Penny produced this gorgeous piece using a Stampotique stamp, available from The Stamp Attic:


I was in the mood for a play with my needle and thread:


This is a 1 1/2" square memory frame.  I coloured the lace flowers with True Colours by Stewart Gill.

I know many of us in the UK are disappointed we can't get hold of Memory Box stamps, so you'll be glad to know, there's another chance to win this week.  Head on over to the cafe to check it out, 

and don't forget to visit our other designers, including our guest designer this week, Elise.


We say goodbye to our fellow designer Stephanie this week, although I'm sure we'll stay in touch!  We've loved working with you Stephanie, thanks for all your hard work at the Play Date Cafe.  We'll miss you

Tuesday 24 August 2010

Steampunkin' Saturday


Quite how this collection passed me by, but when I arrived at The Cubby Hole, Crewe on Saturday to teach my Steampunk Journal workshop, there was the MaGNiFiCieNT Steampunk Debutante collection from Graphic 45 - wonderful not just because they're Steampunk, but they're in my favourite colours AND Art Deco. 

Wow!!!

When we'd finally all got over the excitement, and selected our must have papers, we settled down for the class.


And look!  Two blokes on this workshop :)  Paul, Carol's other half, joined us this week, and judging by the gales of laughter from the 'top table', he fitted in perfectly and had a great time. Paul had never done any stamping before, never mind playing with inks and making books, but he did a fantastic job!  Special thanks to Christine who helped out when necessary :)


I'm sure I've said this before, but what I love about workshops is how differently people's work turns out, and this one was no exception.  There were some wonderful additions of colour to the 'sepia' palette...

 Paul
 'little' Sue
 ...different front covers... 

Paul

[We were so impressed with Suzanne, she sometimes finds this inky, messy work a bit much, in a workshop situation, but she was in her element with this book, and was so chuffed to use the sewing machine for the first time!]


And of course, the inside pages.  [Sorry about the orange hue, these pages are quite orangey but my camera phone seems to think the surrounding table is too!]

 Wendy
Christine
 I had a fantastic time everyone, thanks for being so much fun to be with :)  I'll leave you with some pages from the sample journal I left with Carol...


...a reminder that if you're a 'southern gal', I'll be teaching this class at The Stamp Attic in a couple of weeks [check out their website for deets]
...and finally,  the link to the Graphic 45 blog.  If you're a fan of Steampunk, you HaVe to see their stand at CHA, and how the girls all dressed up, and this amazing project using the new papers :)

Thursday 19 August 2010

a bit of silliness for my PDCC #43


Errr!

Hmmm!

Why?  Well, I decided just to spice things up a bit with a bit of silliness to bring out the smiles :)  I love cute monsters, and have a small collection of them which used to live in my classroom :)

Julie's beautiful inspiration photo this week in the Play Date Cafe is all 'my' colours - blues and greens


Aren't those colours so refreshing looking?  I was glancing through my stamps with a few ideas playing around in my head for these colours, then my eye caught my set of monster stamps that Julie very kindly sent me a while back, and I was hooked!  So nothing beautifullly elegant from me this week ;)


I also realised I hadn't decorated an envelope recently either!  This is a tiny envelope that fits an ATC perfectly...hmm, now there's an idea ;)

This week, we have a UK guest designer - Paul Browning!  Paul has been with us in the cafe from the very beginning and plays every week, to such an extent we were worried when he didn't!  It was all ok though, he'd just nipped off for a holiday!  And don't forget our regular design team:

So hop on over to the cafe to see all the wonderful design team inspiration, and to meet our new 'private blend designer' :)  We have a great prize this week for the winning entry, courtesy of this week's sponsors Creative Inspirations


your choice of 12 colours from
[sparkly paint, yum yum!]

Wednesday 18 August 2010

WOYWW

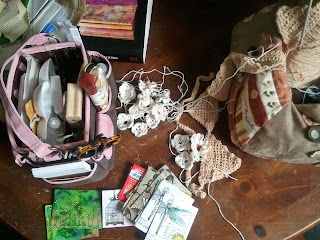
Have just returned from a wonderful holiday on the Isle of Wight and for the last couple of weeks my 'workdesk' has been my lap, a field, a camping table... and I've been very tidy and kept everything organised and in it's place - cos you have too in a tent lol!


The bag to the right contains my wools and crochet hooks - crochet is very portable (I crocheted some of those flowers whilst standing in a fish and chip shop queue on Cowes night!) so easy to take away on holiday.


My little craft bag is pretty portable too, with pencils, pens, paints and blank ATCs to hand.  What you can't see is the small suitcase filled with other bits n bobs, and the jute bag that contained the little craft bag lol!


I decided to catch up on my ATCs whilst I was away.  These were made using Dyan Reaveley's Altered Originals Spray inks (collection 1).  I sprayed the card, allowed it to dry, then used a watery brush to merge the colours.  The flowers are Daisy Daisy (Stampotiqu) from The Stamp Attic, coloured with a white gel pen.


I also had a bit of a play with my new Stabilo Woody pencils (a watercolour, pencil and wax crayon all in one).  I picked these up in an art shop in London, but you can see them here, they are YuMMY! [think you're gonna love these Sue!!]  


I scribbled with the blue and brown pencils, used a wet brush over them, then a walnut ink spray.  I've wanted a white spray for AgEs and finally tracked one down at The Cubby Hole, Crewe.  It's a Memories Mist in Whipped Cream and I used it with a Tim mask over my coloured card.  A bit of stamping, a touch of collage and the ATCs were done!

Happy WOYWW!  Looking forward to having a sneak at your workdesk, and if you're wondering where all this started, head over to the lovely Julia's Stamping Ground for the info :)

Monday 16 August 2010

USAQ DT Project #5 - paints and canvas


This week's design team products are right up my street - paint and canvas YuMMY!!  The trouble was, with sorting out my holiday I didn't have as long to play with these as I wanted.  I'm home later today though so watch out for a canvas project this week :)


I have to say, these paints were absolutely beautiful to work with.  They have no filler and are chock full of pigment so the colours are really rich :)  I decided to paint a little cardboard box with the cobalt turquoise hue, highlighting with yellow ochre and burnt umber through some sequin waste:


I also painted a small piece of studio cloth [canvas] at the same time. I have plenty left to work on something else when I get back from my hols!!


The idea was to layer with papers coated in beeswax.  However, I think my beeswax got contaminated with some embossing powder as it now has a distinct shine!! (now I know why I need to buy a separate project pan lol, or put my beeswax in a metal cake wrapper!)


I have to say though, that the colours look beautifully rich through the beeswax.embossing powder combo!  I layered text and tissue paper printed with a map image.  The tiny watch parts were added at the end.


My thirteen year old daughter has her eye on this little box so I think it will soon be filled with her little treasures :)

The other USAQ DT members all have projects on their blogs so hop on over for a feast to the eyes :)  

Thursday 12 August 2010

PDCC#42 - calm camels in a queue


I chose this photograph for inspiration as it is such fun!  If you're concerned about my colour matching skills, I picked out the green from the uprights on the seats on the camels' backs ;)  That line of camels looks like it just goes on forever!


I've been using bits of lace in my work recently, and on my recent workshop at Paddy's Stamping Place, Paddy brought out some green lace which she called a 'horrific' colour, and suggested we try colouring it with the walnut ink crystals we were using at the time.  The results were very yummy :)


I added more green with snippets of paper, and some little gems.  I used espresso Adirondack colourwash, and the stamped image is by Basic Grey and available from The Stamp Attic.

Have fun with these colours :)  I did, and will definitely be using them again.  And don't forget to see what yumminess the rest of the Play Date Cafe team came up with :)


LinkWithin

Related Posts with Thumbnails