Showing posts with label Sue Roddis. Show all posts

Friday, 17 May 2013

the 'umble ifferous


It fascinates me how there are some images that lots of people love (and some that lots of people love and others hate!), one of which is definitely umbelifferous plants!


For some reason though I can never remember the word 'umbelifferous', and frequently ask Sue 'what's that word for those flowers?'!!!  So I decided a journal page was in order; the blog title is courtesy of Sue after a conversation at Port Sunlight :)


This is started off as another page I didn't feel was very 'me' in my journal.  It got very bright so after a brief panic I stippled white paint through Tim's  Alpha Parts - numeric and am now really pleased with it.  I printed 'umbelifferous' on the computer and over typed it on a typewriter - which was weird after typing on computer keyboards for so many years!

Saturday, 27 April 2013

Gelli Play


 I got to play with a Gelli Plate today :)


I have to say that I hadn't been tempted by one in the slightest...until this week!  I signed up for the '21 Secrets Art Journaling Workshop' a while ago and recently watched Roben-Marie Smith using a Gelli Plate in her journal....and LoVeD it!


 Sue and I had planned a playday today (we've not had one for aaaaaaaaages!) and Sue suggested we play with her Gelli Plate :)  I now need to purchase my own lol


 We spent a couple of hours making papers and printing pages in our journals, stopped for lunch then did some creating with our papers.


[I also got to play with some of Sue's stamps and stencils :)]


I love the textures you can create with the gelli plate.  All I added to this envelope was the flower, the tiny stamped circles and three green paint circles (using the pritt stick lid) and the words 'native graciousness'.


Glassine envelopes are FaB to work with in conjunction with the Gelli Plate :)


 Finally, this envelope came about because Sue found an ant stamp which was just too fun not to use!!

Sunday, 21 April 2013

a fabric art journal (edited for PDCC entry)

 The plan this weekend was to get a shed-load of school prep done.  It didn't happen!  My sewing machine was calling me far too intently.  I'm not sure why as I have new Dylusions inks and a new stencil waiting to be played with.


 The wonderful Sue Roddis of the 'Jabberwocky' has been on a roll making duct tape journals and I decided to make a fabric version!  When journaling with fabric I start in a similar way to my regular journals, by picking my colours and supplies.


I love the edge of cotton fabric where they put the pattern number and the colours used in the print and that ended up being my starting point, along with the feeling that it was a yellow day!


 I stitched strips of fabric next to each other before adding some blocks and finally the flower.


 On the canvas that formed the back cover I added some tiny flowers which were so small I had to hand sew the weeny scraps on.


I then cut a strip of furnishing fabric (only because I liked the feel of it and the colour!) and used it to join the front and back covers together.  The grey strip of fabric with the words on was going to go across the spine and onto the back cover, but I forgot to hold it straight when I was stitching so it went a bit wonky.  I wasn't about to unpick it all (one of the very many reasons I'm not applying for The Great British Sewing Bee!!!) and instead just adapted the design a little, trimming it down then highlighting the word 'creative'.


I love Sue's idea of putting her pages in her duct tape journals with elastic bands so she can easily take them out to work on them.  Elastic bands don't really work on fabric so I've pinned my pages.  


I've used a mixture of materials, including acetate and paper alongside fabric.

EDIT:  I hadn't realised but the colours I used for my journal are near enough those of this week's Play Date Cafe, so I was encouraged to enter!


I did have some exciting PDCC news this week ..


I was awarded the cup of the week and won a $25 gift certificate for Jenni Bowlin Studios - so exciting!!

Friday, 12 April 2013

21 secrets goes pearshaped


 My good friend Chris, from Pearshaped Crafting, came over this morning to do a bit of journaling.  After a bit of umming and ahhing I'd signed up to the '21 Secrets' series of art journaling workshops and we decided to do one this morning.  To choose which one, Chris picked a random number out of her head - 10 - and we counted along to find the tenth workshop which was Kate Crane's!


Funnily enough we've taken a class with Kate together before!


Chris' page started with reds and greens.  I decided to go for browns and greens, but discovered that Mushroom Adirondack spray is nearer a grey when sprayed over gesso!


I didn't have any acrylic ink to hand so used a couple of pipettes to add inky circles with ink taken from my Adirondack spray bottles.


Chris used her Neocolour water soluble crayons to add her circles.  Much more subtle!


I had been saying that I was resisting the current journal trend of painting faces (actually, I don't have to resist hard as faces aren't really 'my thing') but looking at my 'blobs' they seemed to be crying out for facial features.  Sue's funny bird doodles came to mind, as did Dr Seuss and Carla Sonheim's imaginary creatures!!!


I intended to make a couple of the 'blobs' into flowers, but forgot - or maybe they just didn't want to be flowers!!


The blob at the base of the 'elephant' looked so like a little snail without a shell I just had to doodle him in, despite it looking a bit odd, but then, the whole page is odd!


I just added eyes to each blob and went from there!


"Be who you are"
Dr Seuss

EDIT:  Chris has blogged her page so head on over to her blog HERE to see how differently the pages turned out!

Saturday, 27 October 2012

a paper cutting exhibition at Manchester Art Gallery


I've been looking forward to this exhibition for a while as I love paper (!) and it features the fantastic work of Rob Ryan.  What I didn't anticipate was that it would also feature work by the very talented Su Blackwell and that there'd be some pieces I'd be familiar with from books on papercutting.


The piece by Rob Ryan was especially created for this exhibition.  It's huge!  [note: I don't know those people, I just thought it gave a good idea of scale with them there!]


When you enter the exhibition you pass through this enchanted forest.  The branches are suspended from the ceiling and hover just above the floor.


The above piece is one I've seen in a book or on the internet.  I love it and it was great to see it 'in the flesh' as it were!


The black swirls above were enormous - I'm trying to choose wallpaper for our living room and would love this!  [Sophie wasn't impressed!]


Yes, that motorbike is life size and made of paper.  There's a skeleton elsewhere in the gallery made by the same artist.  Amazing.


I won't share any more images as I don't want to spoil it for others who may go to the exhibition (Sue?!) but will leave you with some images of Su Blackwell's work, which made me want to have a go at paper cutting some time next week :)


Sunday, 11 December 2011

these boots weren't made for walking!


My fab 'jabberwocky' friend Sue and I took a trip out to the depths of Staffordshire on Saturday afternoon to make paper shoes :)   The workshop was run by the very talented Jennifer Collier (check out her paper vintage typewriter!) in her exhibition, workshop and studio space 'unit twelve'.  


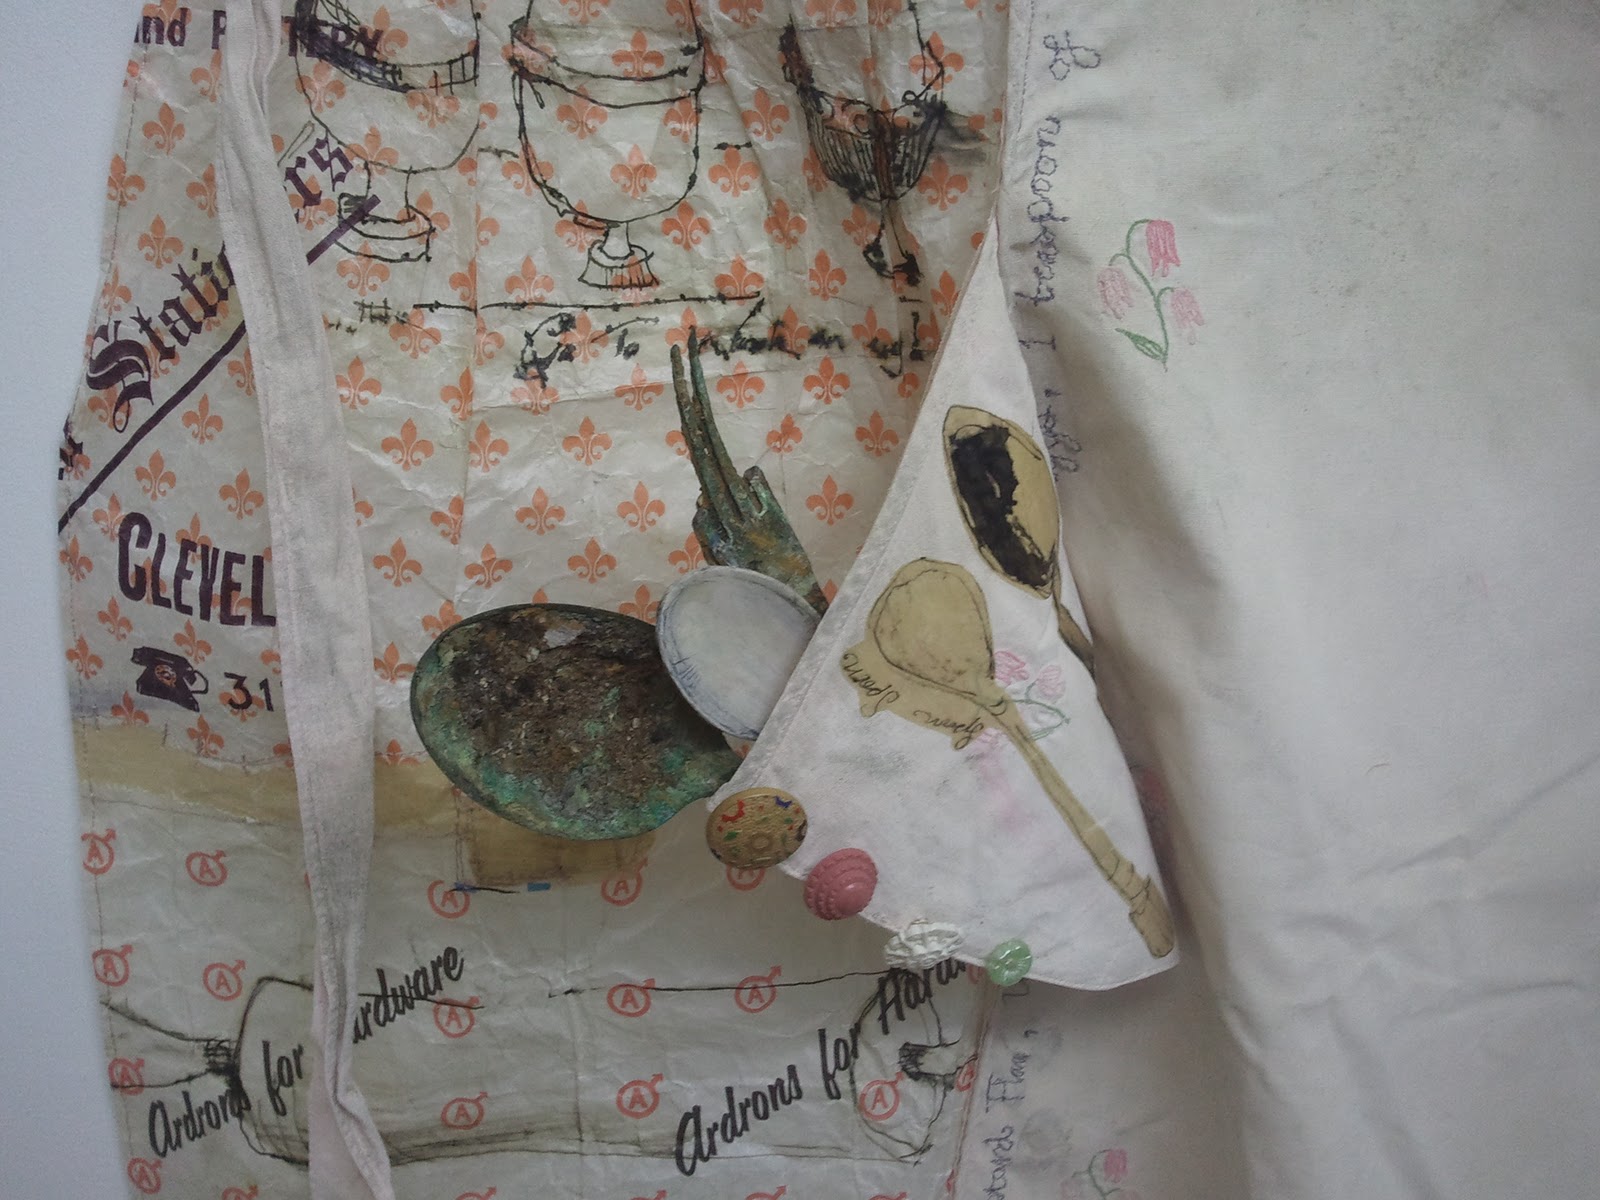
The current exhibition is entitled 'the ties that bind' and features an eclectic mix of aprons, including one made from a tin pail!


My favourite one had spoons in its pockets, and I LoVe spoons!  I wasn't surprised to discover it was made by Priscilla Jones, who's one of my very favourite mixed media artists.


Both Sue and I loved the wonderful 'wallpaper' in the exhibition space, created with pieces cut from old dress patterns.


Through the exhibition space is the workshop area and a number of small studio spaces.  


I got myself a couple of Christmas presents (my mother in law has been asking what I would like so she'll be happy she only has to wrap them!) from the very talented Jo Hill, Emily Notman and Louise Wilson.


I had to finish my shoes off at home.  I changed the lace up ones slightly so as they look more like my own, and shortened the alice shoe design.


I added laces made from strips of cotton, lace and organza.


I added stitched flowers to my alice shoes, and press studs.  Not a great photo I'm afraid as the glue was still wet further up!!


I love my paper shoes :)

LinkWithin

Related Posts with Thumbnails